
Now that your pattern pieces are cut, serged, and marked, we'll cover the zipper installation process that applies to many of the zippers on the ENT jumpsuit. Rather than repeat ourselves unnecessary later on, we'll simply demonstrate it here and refer you back to this process as needed throughout the tutorial.
This zipper installation process applies to those on the chest pockets, thigh pockets, and right sleeve pocket. We'll cover the front zipper, sleeve zippers, leg zippers, and calf pockets separately.
Lastly, in addition to the "standard" zipper installation process, we'll be offering numerous optional tips to help you get the best results. You may use any, all, or none of them - whatever you feel is the right balance of ease, haste, budget, and results for you!
Begin by identifying the recommended zipper placement on the actual pattern piece.


Our first optional tip is to stabilize and reinforce the general area of the zipper with a lightweight fusible interfacing. We recommend cutting it with pinking shears ("pinking" it), thus minimizing the effect of strong, linear imprints on the right side of the garment where the edges of the interfacing are, better obscuring them.

Next, mark the specific zipper placement. We recommend using tailor's chalk if you didn't use interfacing, or a disappearing ink fabric marker if you did choose to interface the general zipper area.

Our next optional zipper installation tip is to stitch around the corners (say, ½" from each end) using a short stitch to help prevent fabric threads unraveling at the corners.

If you stitch around the corners, just make sure that the stitching is hidden on the right side of the pocket once the edges and turned under and pressed.

Our third optional tip is to apply a ½" double-sided fabric tape or hem tape to the zipper opening (between the marked edges).
If you choose to use the double-sided tape, definitely follow the manufacturer's directions!
That said, with the particular kind we often use (pictured above), the tape is on a roll and applied sticky side down, with the paper backing facing upward.

After firmly pressing to ensure adhesion, carefully pull off the paper backing.

NOTE: While the ½" double-sided tape does help keep the cut edges in place while attaching the zipper, it is accompanied by the caveat that it may "gunk up" your sewing machine's needle and/or fabric scissors by leaving glue or other adhesive residue! We don't usually use it on our zippers for this reason, but it can be helpful if you're having difficulty installing the zippers well. Just remember to regularly clean or change your sewing machine's needle and/or fabric scissors as needed.
Slash the zipper opening halfway between the two lines, cutting diagonally to the corners about ½" from each end of the opening (forming little triangles).

Fold the cut edges to the underside and firmly press.

NOTE: If you chose to use some ½" double-sided tape, the edges will probably sit nicely with only light pressing.
Your zipper opening should be exactly ½" wide.

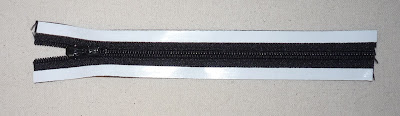
It's best to start with a zipper quite a bit longer than the actual pocket zipper, cutting it down to size later.

We generally recommend cutting the zipper about 1" longer/taller than the zipper opening, leaving about ½" on each end. You can cut it slightly longer on some openings, though.

The edge stitching (which we'll demonstrate shortly) will prevent the zipper pull from coming off once the zipper is installed onto the pocket, but be careful not to slide it too high or low until then!

Our fourth optional tip is to close the extreme ends of the zipper with a bar tack, which is just a wide zig-zag stitch centered over the zipper teeth with the stitch length set to 0.
(We don't bother with the bar tacks since the edge stitching keeps the installed zippers closed, but it is a good way to keep your cut zippers safe in the mean time! It's also good as a backup in case your edge stitching comes undone for some reason later.)
Our fifth optional zipper installation tip involves the use of ¼" double-sided tape, similar to that mentioned previously for the securing the cut edges of the zipper opening.
This works great as a substitute for basting and will hold your zipper in place while you edge stitch it around the opening (which we'll demonstrate next). The multiple layers of denim make pinning difficult, and basting takes time; it can be incredibly frustrating to install your zipper only to see that it shifted during the stitching, and/or the fabric around it pulled one way or the other!
We really can't recommend this stuff enough.

Again, if you choose to use some ¼" double-sided tape, follow the manufacturer's directions!
That said, this will typically involve unrolling the tape (sticky side down) onto the zipper tape and cutting to size. If your zipper is 1" wide, excellent! Position it flush with the outer edges, and you'll automatically have a ½" reference!

Next, carefully peel off the paper backing.

Carefully position your zipper over the zipper opening, centered and with the zipper ends overhanging the hole.
If you're using the ¼" double-sided tape (again, which we highly recommend!) and a 1" zipper, this will serve as a natural alignment guide, as the tape itself should not be visible from the right side of the pocket.
You want it to look like this:

Not like this:

Using your zipper/piping foot, edge stitch around the perimeter of the zipper opening, securing the zipper tape and the clipped allowances. Reinforce the stitching at the corners, and several times over the ends of the zipper.

And finally, our last optional zipper installation tip is to apply some liquid fray preventer to the corners of the zipper opening to help prevent any of the clipped fabric threads from unraveling.
(As always, though, test on a scrap first to make sure that it dries clearly and inconspicuously!)

Your finished pocket zipper should look like this:

Our preferred "aids" are pinked lightweight fusible interfacing, reinforcing the corners, ¼" double-sided tape on the zipper itself, and applying liquid fray preventer to the corners after installation.
However, what works best for us might not be what works best for you, so if you're not sure, just install a few zippers for practice using the different optional tips we mentioned to find what gives you the best results!
PREVIOUS: Tutorial, part 1 - Pattern Pieces
No comments:
Post a Comment