
As mentioned previously, for the best results, we recommend using bias-cut cotton twill for the division stripes.
However, if you prefer to use cotton lycra, you may wish to stabilize it with some fusible interfacing (as seems to have been done with the screen-used ENT jumpsuits, which you may recall from our ENT jumpsuit analysis).
Begin by folding your division stripe the long way (so the long edges are flush), wrong sides together, and press.

Fold the stripe in half again, this time the other way (so the opposite short edges are flush) and press.

With the double-folded end of the division stripe on your right and the folded edges on the bottom, using tailor's chalk or a disappearing ink fabric marker, make a small mark at the top (the raw edges) 1" from the right (the double-folded edge).

Again using tailor's chalk or a disappearing ink fabric marker, draw a line from your previous mark to the lower right corner (the folded edges). This is your stitch line.

Starting at the top (the raw edges), stitch over this line with a short stitch length, leaving the last ¼" free and un-sewn! (That last bit is important.) Reinforce the stitch several times at the end.

This will help create that screen-used "not-quite-mitered-to-the-edge" effect we mentioned in our ENT jumpsuit analysis.
At this point, you have two options, and we recommend experimenting on some scraps to determine which gives you the best results.
The first method is to simply unfold the division stripe and carefully press the excess fabric downward.

TIP: "Poke" the outermost corner of the stripe's miter with the iron (steaming, of course!) some to really maximize that screen-used "not-quite-mitered-to-the-edge" effect.
We've had better results with this method than the following one, but it does have the disadvantage of creating additional bulk on the underside of the stripe, which increases the danger of any unsightly bulges at the corners (especially if you accidentally over-press the area).
The second option is to cut away the bulk of the excess fabric approximately ⅛" from the stitch line.

Unfold the stripe.
Carefully separate the allowances and press them open, then press the "hood" at the corner flat as with the first method.

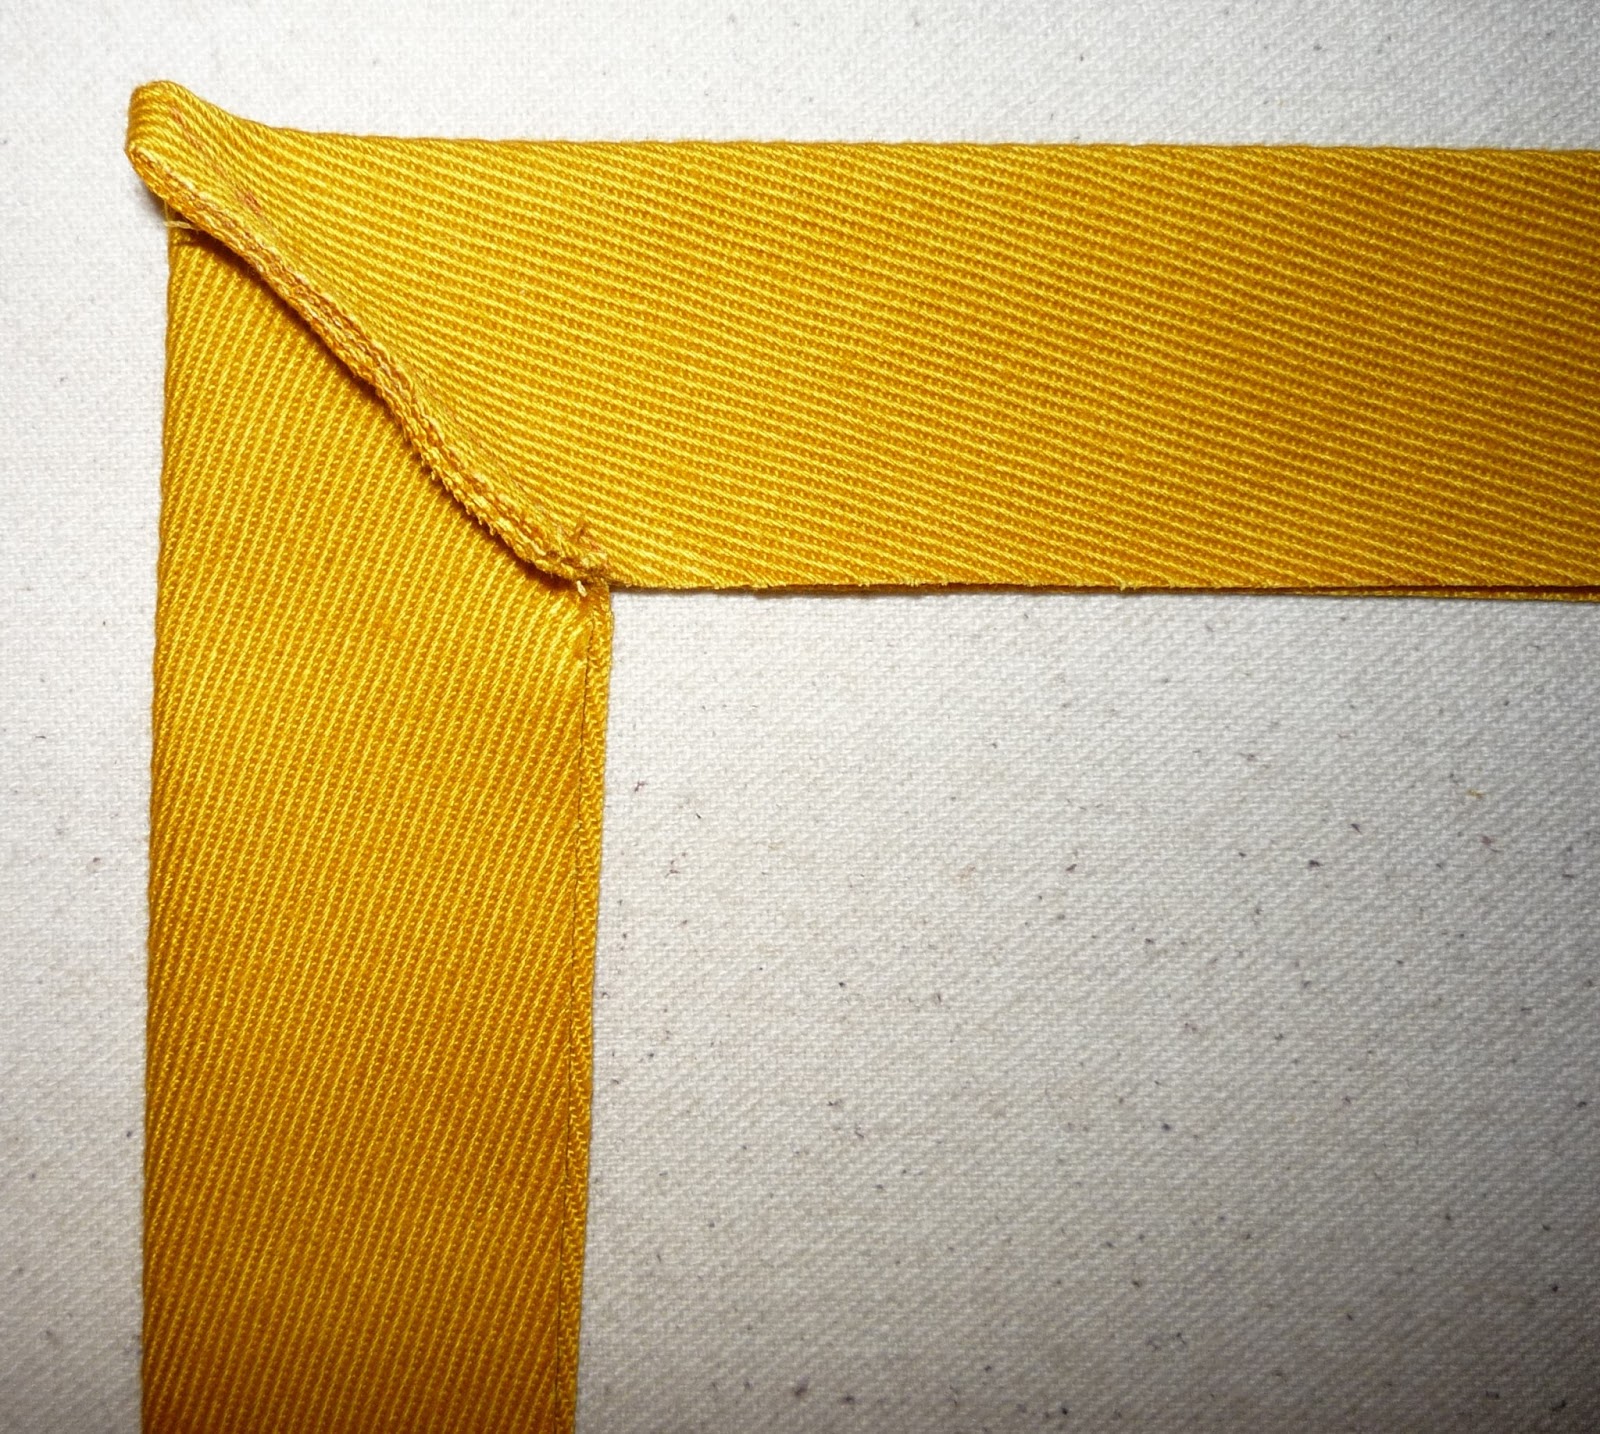
Whichever method you choose, your finished miter should look something like this:

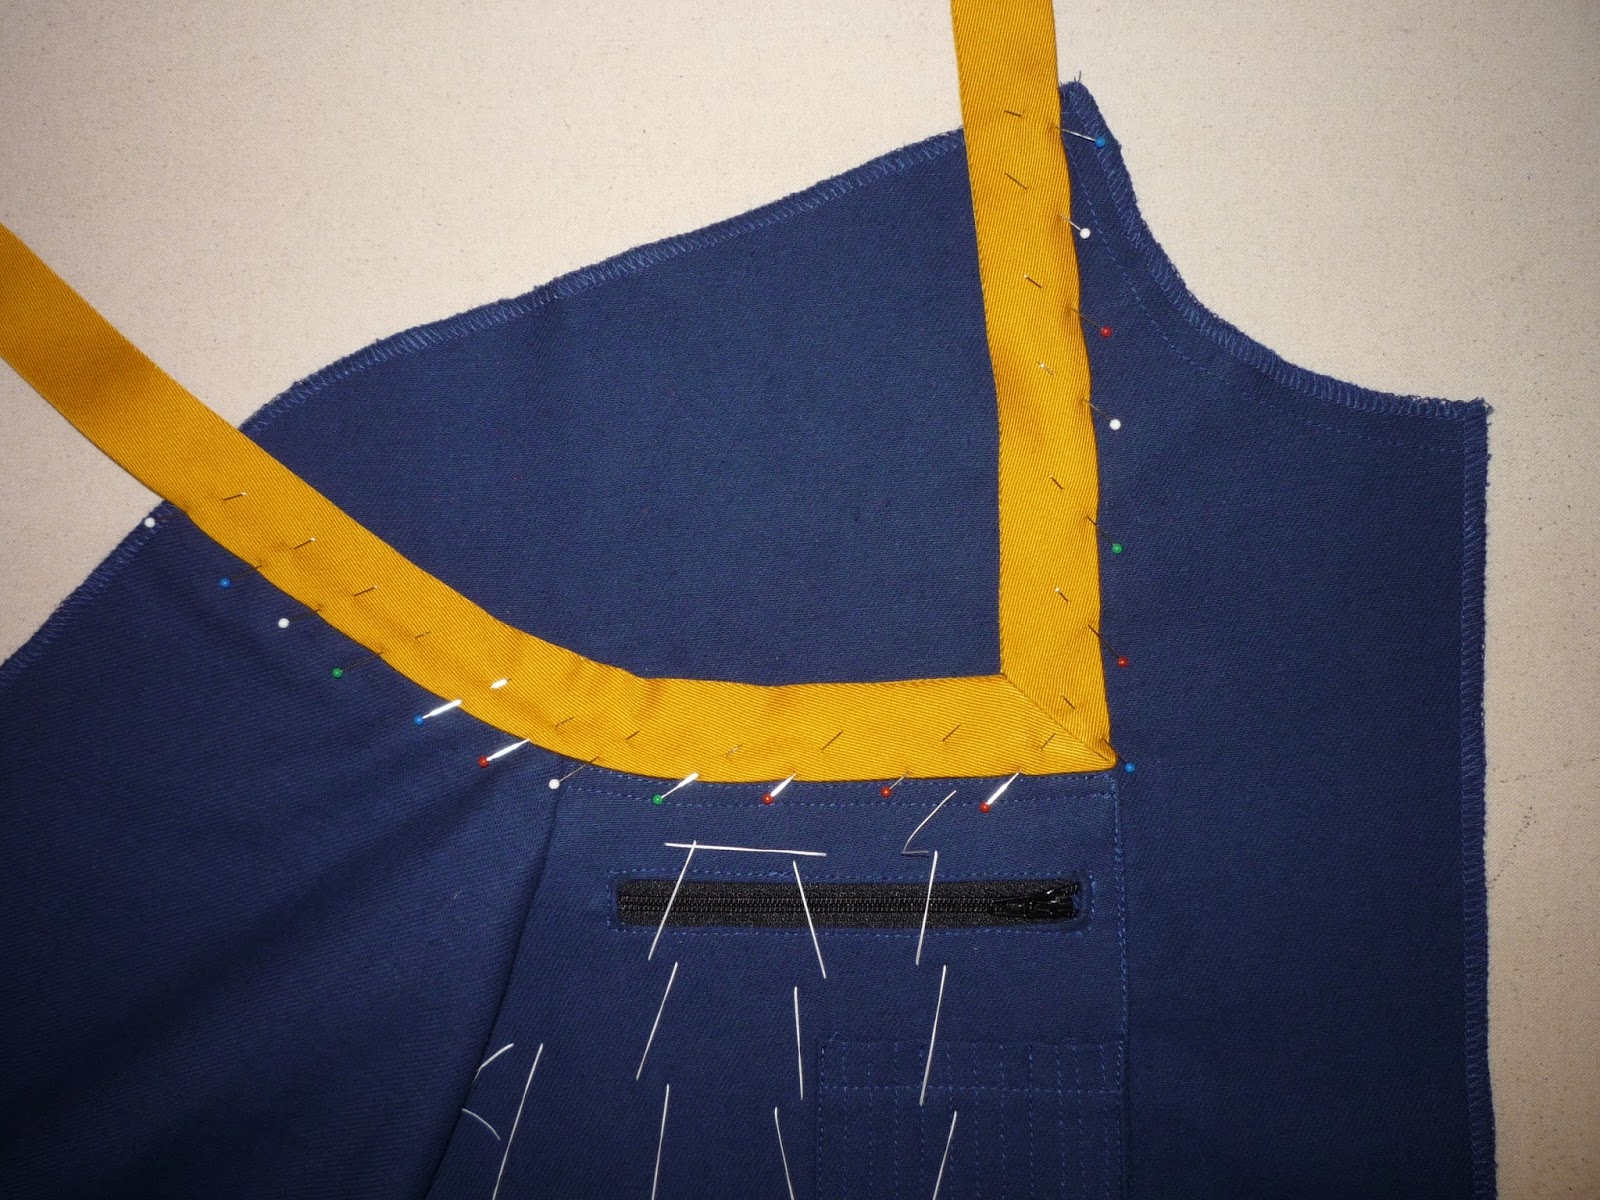
Position your division stripe onto the jumpsuit body.
The stripe will probably be quite a bit longer than necessary, so begin by pinning the lower (mitered) corner into place so it is flush with the upper edge of the chest pocket and the centermost (vertical) edge you previously marked with the aid of the alignment guide! (See below.)

 |
| There's always a bit left over, isn't there? |
Pin the remainder of the division stripe to the body.
The centermost edge should be flush with the alignment guide, and the lower edge should be flush with the upper edge of the chest pocket and the upper edge of the sleeve.
Using your division-colored thread, edge stitch the division stripe to the front body.


Cut off the excess stripe material so the upper and outer edges are flush with the body edges.

In the manner of your choice, mark a shoulder reinforcement alignment guide onto the division stripe ⅜" from the folded/edge-stitched edges.
You may wish to use tailor's chalk or a disappearing ink fabric marker, but we prefer to simply sew a basting stitch in contrasting thread over the entirety of the stripe.

You may wish to notch the division stripe fabric a bit along the curve to get it to lie flat, but if you're using bias-cut cotton twill, some gentle pressing and steam should get it to conform nicely to the curved edge.
Press your front shoulder reinforcement (piece G), then press under the hems on the lower and centermost edges, notching the lower edge as necessary to get it to smoothly conform to the curve. (We do recommend notching no farther than ⅜" from the raw edges, though!)


Pin the front shoulder reinforcement to the front body so its centermost and lower edges are flush with the guide (a basting stitch, in our case) and its shoulder edge is flush with that of the body.

TIP: We highly (and we do mean HIGHLY!) recommend tailor-basting the shoulder reinforcement to the front body prior to sewing it to the body. (See below.)

Switching back to your blue thread, edge stitch the shoulder reinforcement to the body along the entirety of its perimeter.
We also recommend basting or sewing all the layers together ¼" and again ½" from the shoulder seam.
Once the shoulder reinforcement is secured to the jumpsuit body, press (using a liberal amount of steam!) the shoulder area between the hem allowances. With the tailor basting holding the two layers snug, they should adjust and snuggle with each other so that the whole shoulder lies nice and flat!

See how much better that looks?!?!?
(In case you somehow haven't realized it already, I'm a big fan of tailor-basting.)
If you basted your alignment guide, remove the basting stitches. If you marked it somehow, remove the mark.
Repeat for the other side.

Repeat for the two back halves using the back shoulder reinforcement (piece H) and back body (piece C).

PREVIOUS: Tutorial, part 8 - Sleeves to Body
No comments:
Post a Comment